Friday, February 25, 2011

Corn Husk Process (2nd Round)

Thick Fiber and Corn Hair


Today I cast another inner-sole with the ticker batch of fibers and the hair that you find when you peel off the husk.  In this cast I used half of the amount of Corn Husk by Weight making it 12g of fiber to 131g of rubber and Im using a 44grade stiffness of rubber (slightly more flexible then the last batches and a clearish yellow tint).
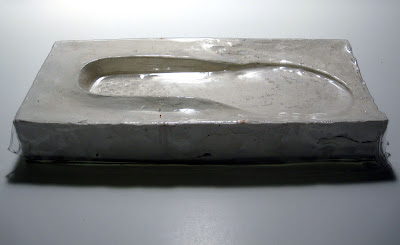
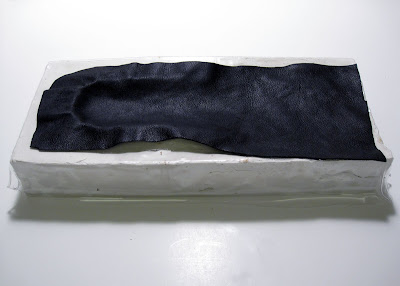
 Below are picture of the casting process.


Cover the plaster mold with Vacu-Formed PETG Plastic insert.


Weighed out the Rubber and the Corn Fiber (the hair is ground up inside)


Added the two together and mixed for 5 minutes.  


I distributed the mixture in the mold as well as I can to the final shape.


I add the precut leather piece on top of the uncured rubber mixture and tap it down lightly.


Then I add the second Vacu-Formed plate made from the upper portion of the Mold. (This presses the leather tight so there are no creases. 


Finally I add the top half of the plaster mold and stack a bunch of books on top and leave it for 24 hours.



Thursday, February 24, 2011

Corn Husk Experiment


CORN HUSK Inner-Soles


I decided to explore other alternatives to Coco-fiber since I've got the sole casting down pretty well.

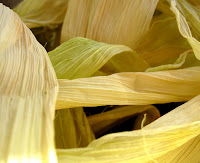
Today I bought a bunch of corn and shucked the husks and let them dry out (mostly by microwaving the hell out of them)

Then I put the husks into the blender to grind them up.  I originally did three different grades of husk fiber but the weight was pretty low so I combined the small and the medium grade into one.   Then I used the same weight ratio to cast the first Husk Sole.  Belowis a picture of the medium to fine grade husk fibers and a few pictures of the resulting cast.


Alexander's Shoe Repair

Today I spent several hours at Alexander's Shoe Repair with a cobbler named Nicholas.  The first thing he says is "I want to quit"

Nicholas has been working on shoes for over 30 years.   He is the only employee at his fathers shop and has "shoes piled on his head."

People come in constantly interrupting his work and helping him look for their own shoes piled up in the back of his shop.  Most of the jobs aren't finished when the customers arrive and he'll do them in 5 or 10 minutes.

He showed me around and told me about some of the machinery he uses and some prices on equipment.  A big sanding and polishing unit can be bought used for around 8k.

He has a nail gun machine for soles, an industrial singer with a rotational walking foot, and several industrial sewing machines for the thick stitching around the welt of a boot.

He also showed me the industrial contact cements that he uses for shoes called "Barge all purpose Cement"


Nicholas sanding away at a platform heel.


Sewing machine used for thick sole stitching.


Rotational Walking foot, Cool!


Industrial Strength contact cement for shoes.


Wednesday, February 23, 2011

Casting COCONUT soles

The last few days I have been casting several coconut fiber/rubber soles using the Uerethane Rubber compound.

I have been using a ratio of 131g of rubber to 25g of cocofiber.  This may sound like a lot more rubber but its not.  By the time they are mixed the rubber seems almost dry.

I have also been testing several materials that could go on the top of the sole and how they might be stuck to it.

It seems nothing wants to stick to the rubber after its set so glues and paints are out for now.  However if the rubber is allowed to set with a material on the surface it will bond to the material.  However, if the material is absorbent it will draw the rubber mixture all the way through the material. Therefore, leathers and plastics seem to work the best.


The one on the far left is straight out of the mold showing the flash on the edges. The sole to the right of it and in the middle has a canvas top, the white one was stuck on with glue and then sewed because the adhesive failed. On the other, the rubber soaked straight through.   Finally the soles on the right have leather tops and came out really nice. 


Tuesday, February 22, 2011

Meeting with Colin and Cleaning the Mold

Colin Suggested that I clean up the mold as best I can so I get the most amount of product out of them.

I used his suggestion of vacuforming over the mold with PETG plastic so if it were to get messed up I could just do another pull and continue to pour new casts.

Below is a picture of me vacuforming over my mold.


Sunday, February 20, 2011

Grant Writer Visit

This weekend I went down to LA to visit a family friend who has done grant writing and consulting for non-profits for many years.
She suggested that I contact some private entity like the CCA grant department or some other non-profit that can offer tax deductions on donations from donors.

Thursday, February 17, 2011

Plaster Mold

Today I went up to the shop and asked Marty if I could use some plaster to make a mold.  I took the innersole from the snow boarding boot Mike gave me as the basic form for my inner sole... it could have been any inner-sole at this point so this one was fine.

I was trying to make this on a tight budget so all of my material was found.  I used some 8th inch plex to build a box for the mold.  If I were doing this like a pro I would have used a stronger material like wood, thicker plex, or both wood and plex.

In any case the 8th" bowed a little but worked ok.

So I poured the plaster into the box, then pushed the inner sole into the plaster before it stiffened up too much.  Then, once the lower half of the mold was hardened, I added a coat of oil to top of the mold, leaving the inner sole in the mold, and poured  the top half of the mold.

At this point I was running out of plaster and out of time in the shops so the top of the mold is broken and thin.  Again, not an ideal situation but it works for the purpose of making inner-sole samples.